Rounded Corners
The .rounded class adds rounded corners to an image:
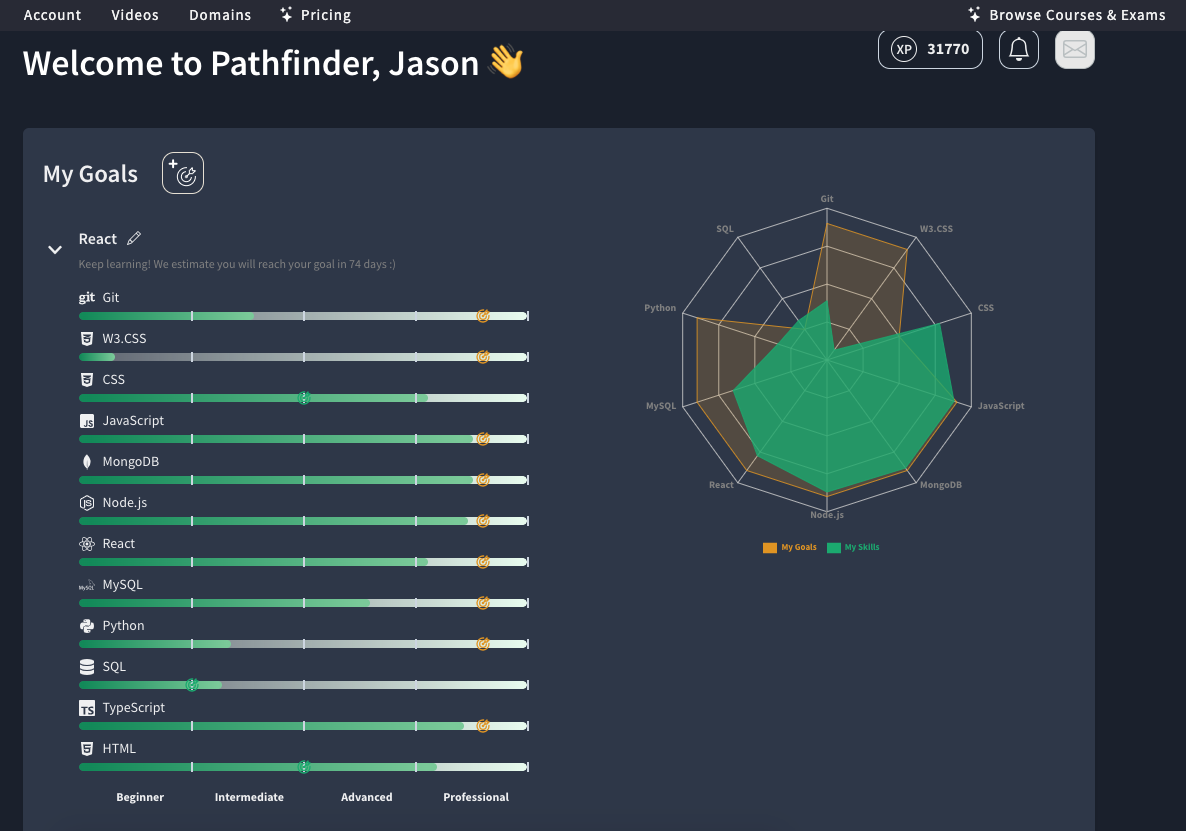
a passionate web developer 5 years into a mission to push the boundaries of technology and creativity.
Alongside that, I've mastered the powerful features of React and TypeScript during my postgraduate studies, expanding my toolkit for building dynamic, efficient web applications.
With a solid foundation in front-end web development from my tech degree at Treehouse, I've delved, dived, jumped....went way down into... deep into the world of web technologies.
This is how I learned Bootstrap5, following W3 Schools Curriculum, I created the website that gets built out as the result of documenting the journey through the documentation.
This is what I recommend for any beginner that really wants to know a framework...write it out while building what it says...as we complete the courses and then I will have in one repo a code snippet for every single feature of the framework (WITH SOLID NOTES!)
while solidifying my capabilities, a flawless plan!
The .container-fluid class provides a full width container, spanning the entire width of the viewport.
Resize this responsive page to see the effect!
Lorem ipsum dolor sit amet, consectetur adipisicing elit...
Ut enim ad minim veniam, quis nostrud exercitation ullamco laboris...
Lorem ipsum dolor sit amet, consectetur adipisicing elit...
Ut enim ad minim veniam, quis nostrud exercitation ullamco laboris...
Lorem ipsum dolor sit amet, consectetur adipisicing elit...
Ut enim ad minim veniam, quis nostrud exercitation ullamco laboris...
To indicate input that is typically entered via the keyboard, use the kbd element:
Use ctrl + p to open the Print dialog box.
For multiple lines of code, use the pre element:
    Text in a pre element
    is displayed in a fixed-width
    font, and it preserves
    both      spaces and
    line breaks.
Use the contextual background classes to provide "meaning through colors".
This text is important.
This text indicates success.
This text represents some information.
This text represents a warning.
This text represents danger.
Secondary background color.
Dark grey background color.
Light grey background color.
Use the contextual classes to provide "meaning through colors":
This text is muted.
This text is important.
This text indicates success.
This text represents some information.
This text represents a warning.
This text represents danger.
Secondary text.
This text is dark grey.
Default body color (often black).
This text is light grey (on white background).
^This is grey on a white bg^
This text is white (on white background).
^This is white on a white bg^
Add 50% opacity for black or white text with the .text-black-50 or .text-white-50 classes:
Black text with 50% opacity on white background
White text with 50% opacity on black background
The .table class adds basic styling (light padding and horizontal dividers) to a table:
| Firstname | Lastname | |
|---|---|---|
| John | Doe | john@example.com |
| Mary | Moe | mary@example.com |
| July | Dooley | july@example.com |
The .table-striped class adds zebra-stripes to a table:
| Firstname | Lastname | |
|---|---|---|
| John | Doe | john@example.com |
| Mary | Moe | mary@example.com |
| July | Dooley | july@example.com |
The .table-bordered class adds borders on all sides of the table and the cells:
| Firstname | Lastname | |
|---|---|---|
| John | Doe | john@example.com |
| Mary | Moe | mary@example.com |
| July | Dooley | july@example.com |
The .table-hover class enables a hover state (grey background on mouse over) on table rows:
| Firstname | Lastname | |
|---|---|---|
| John | Doe | john@example.com |
| Mary | Moe | mary@example.com |
| July | Dooley | july@example.com |
The .table-dark class adds a black background to the table:
| Firstname | Lastname | |
|---|---|---|
| John | Doe | john@example.com |
| Mary | Moe | mary@example.com |
| July | Dooley | july@example.com |
Combine .table-dark and .table-striped to create a dark, striped table:
| Firstname | Lastname | |
|---|---|---|
| John | Doe | john@example.com |
| Mary | Moe | mary@example.com |
| July | Dooley | july@example.com |
The .table-hover class adds a hover effect (grey background color) on table rows:
| Firstname | Lastname | |
|---|---|---|
| John | Doe | john@example.com |
| Mary | Moe | mary@example.com |
| July | Dooley | july@example.com |
The .table-borderless class removes borders from the table:
| Firstname | Lastname | |
|---|---|---|
| John | Doe | john@example.com |
| Mary | Moe | mary@example.com |
| July | Dooley | july@example.com |
Contextual classes can be used to color the table, table rows or table cells. The classes that can be used are: .table-primary, .table-success, .table-info, .table-warning, .table-danger, .table-active, .table-secondary, .table-light and .table-dark:
| Firstname | Lastname | |
|---|---|---|
| Default | Defaultson | def@somemail.com |
| Primary | Joe | joe@example.com |
| Success | Doe | john@example.com |
| Danger | Moe | mary@example.com |
| Info | Dooley | july@example.com |
| Warning | Refs | bo@example.com |
| Active | Activeson | act@example.com |
| Secondary | Secondson | sec@example.com |
| Light | Angie | angie@example.com |
| Dark | Bo | bo@example.com |
You can use any of the contextual classes to only add a color to the table header:
| Firstname | Lastname | |
|---|---|---|
| John | Doe | john@example.com |
| Mary | Moe | mary@example.com |
| July | Dooley | july@example.com |
| Firstname | Lastname | |
|---|---|---|
| John | Doe | john@example.com |
| Mary | Moe | mary@example.com |
| July | Dooley | july@example.com |
The .table-sm class makes the table smaller by cutting cell padding in half:
| Firstname | Lastname | |
|---|---|---|
| John | Doe | john@example.com |
| Mary | Moe | mary@example.com |
| July | Dooley | july@example.com |
The .table-responsive class adds a scrollbar to the table when needed:
| # | Firstname | Lastname | Age | City | Country | Sex | Example | Example | Example | Example | Example | Example | Example | Example | Example | Example | Example | Example |
|---|---|---|---|---|---|---|---|---|---|---|---|---|---|---|---|---|---|---|
| 1 | Anna | Pitt | 35 | New York | USA | Female | Yes | Yes | Yes | Yes | Yes | Yes | Yes | Yes | Yes | Yes | Yes | Yes |
The .rounded class adds rounded corners to an image:
The .rounded-circle class shapes the image to a circle:
The .img-thumbnail class creates a thumbnail of the image:
Center an image by adding the utility classes .mx-auto (margin:auto) and .d-block (display:block) to the image:
The .img-fluid class makes the image scale nicely to the parent element (resize the browser window to see the effect):
Lorem ipsum dolor sit amet, consectetur adipiscing elit, sed do eiusmod tempor incididunt ut labore et dolore magna aliqua. Ut enim ad minim veniam, quis nostrud exercitation ullamco laboris nisi ut aliquip ex ea commodo consequat..
Alerts are created with the .alert class, followed by a contextual color classes:
Add the alert-link class to any links inside the alert box to create "matching colored links".
The button with class="btn-close" and data-bs-dismiss="alert" is used to close the alert box.
The alert-dismissible class aligns the button to the right.
The .fade and .show classes adds a fading effect when closing the alert message.
To create a block level button that spans the entire width of the parent element, use the .d-grid "helper" class on the parent element:
If you have many block-level buttons, you can control the space between them with the .gap-* class:
Add spinners to buttons:
The .btn-group class creates a button group:
Add class .btn-group-* to size all buttons in a button group.
Use the .btn-group-vertical class to create a vertical button group:
Button groups are "inline" by default, which makes them appear side by side when you have multiple groups:
Nest button groups to create dropdown menus:
To create a default progress bar, add a .progress class to a container element and add the progress-bar class to its child element. Use the CSS width property to set the width of the progress bar:
The height of the progress bar is 1rem (16px) by default. Use the CSS height property to change the height:
Use any of the contextual color classes to change the color of the progress bar:
The .progress-bar-striped class adds stripes to the progress bars:
Add the .progress-bar-animated class to animate the progress bar:
Create a stacked progress bar by placing multiple bars into the same div with class="progress":
To create a spinner/loader, use the .spinner-border class:
Use any text color utilites to add a color to the spinner:
Use the .spinner-grow class if you want the spinner/loader to grow instead of "spin":
Use .spinner-border-sm or .spinner-grow-sm to create a smaller spinner:
Add spinners to buttons:
To create a basic pagination, add the .pagination class to an ul element. Then add the .page-item to each li element and a .page-link class to each link inside li:
Add class .active to let the user know which page he/she is on:
Add class .disabled if a page for some reason is disabled:
Add class .pagination-lg for larger blocks or .pagination-sm for smaller blocks.
Large:
Default:
Small:
Use utilitiy classes to change the alignment of the pagination:
The .breadcrumb class indicates the current page's location within a navigational hierarchy:
The disabled class adds a lighter text color to the disabled item. And if used on links, it will remove the default hover effect.
Use the .list-group-flush class to remove some borders and rounded corners:
Use the .list-group-numbered class to create list items with numbers in front of them:
The .list-group-horizontal class displays the list items horizontally instead of vertically:
Move the mouse over the linked items to see the hover effect:
Combine .badge classes with utility/helper classes to add badges inside the list group:
Use .card-title to add card titles to any heading element. The .card-text class is used to remove bottom margins for a p element if it is the last child (or the only one) in card-body. The .card-link class adds a blue color to any link, and a hover effect.
Image at the top (card-img-top):

Image at the bottom (card-img-bottom):

Turn an image into a card background and use .card-img-overlay to overlay the card's text:

The .dropdown class is used to indicate a dropdown menu.
Use the .dropdown-menu class to actually build the dropdown menu.
To open the dropdown menu, use a button or a link with a class of .dropdown-toggle and data-toggle="dropdown".
The .dropdown-divider class is used to separate links inside the dropdown menu with a thin horizontal line:
The .dropdown-header class is used to add headers inside the dropdown menu:
The .active class adds a blue background color to the active link.
The .disabled class disables a dropdown item (grey text color and a no-parking-sign on hover).
Add the .dropend class next to the dropdown menu to right-align the dropdown. Note that the caret/arrows is added automatically:
Add the .dropstart class next to the dropdown menu to left-align the dropdown. Note that the caret/arrow is added automatically. Also note that we float the dropdown to the right:
Add the .dropdown-menu-end class to .dropdown-menu to right-align the dropdown menu.
The .dropup class makes the dropdown menu expand upwards instead of downwards:
It must be room for the dropup menu to grow. That is why we add some extra lorem ipsum text.
Lorem ipsum one more time!
The .dropdown-item-text class is used to add plain text to a dropdown, or used on links for default link styling.
Nest button groups to create dropdown menus:
Click on the button to toggle between showing and hiding content.
Add the show class next to the collapse class to show the content by default.
Click on the button to toggle between showing and hiding content.
Note: The data-bs-parent attribute makes sure that all collapsible elements under the specified parent will be closed when one of the collapsible item is shown.
Basic horizontal menu:
Left-aligned nav (default):
Centered nav:
Right-aligned nav:
Use the .flex-column class to create a vertical nav:
Turn the nav menu into navigation tabs with the .nav nav-tabs class. Add the active class to the active/current link. If you want the tabs to be togglable, see the last example on the tutorial page.
Turn the nav menu into navigation pills with the .nav nav-pills class:
To justify tabs/pills (equal width), use the .nav-justified class:
Justified tabs:
Lorem ipsum dolor sit amet, consectetur adipisicing elit, sed do eiusmod tempor incididunt ut labore et dolore magna aliqua.
Lorem ipsum dolor sit amet, consectetur adipisicing elit, sed do eiusmod tempor incididunt ut labore et dolore magna aliqua.
A navigation bar is a navigation header that is placed at the top of the page.
The navbar-expand-xxl|xl|lg|md|sm class determines when the navbar should stack vertically (on xxlarge, extra large, large, medium or small screens).
A navigation bar is a navigation header that is placed at the top of the page.
Use the .justify-content-center class to center the navigation bar.
In this example, the navbar will be centered on medium, large and extra large screens. On small screens it will be displayed vertically and left-aligned (because of the .navbar-expand-sm class).
Use any of the .bg-color classes to add a background color to the navbar.
Tip: Add a white text color to all links in the navbar with the .navbar-dark class, or use the .navbar-light class to add a black text color.
The .navbar-brand class is used to highlight the brand/logo/project name of your page.
When using the .navbar-brand class with images, Bootstrap 5 will automatically style the image to fit the navbar.
Use the .navbar-text class to vertical align any elements inside the navbar that are not links (ensures proper padding).
In this example, the navigation bar is hidden on small screens and replaced by a button in the top right corner (try to re-size this window).
Only when the button is clicked, the navigation bar will be displayed.
Tip: You can also remove the .navbar-expand-md class to ALWAYS hide navbar links and display the toggler button.
This example adds a dropdown menu in the navbar.
You can also include forms inside the navigation bar.
A sticky navigation bar stays fixed at the top of the page when you scroll past it.
Scroll this page to see the effect. Note: sticky-top does not work in IE11 and earlier.
Some example text. Some example text. Some example text. Some example text. Some example text.
Some example text. Some example text. Some example text. Some example text. Some example text.
Some example text. Some example text. Some example text. Some example text. Some example text.
Some example text. Some example text. Some example text. Some example text. Some example text.


The example above shows how to create a basic carousel with indicators and controls.
I had such a great time learning
Thank you, W3 SCHOOLS

The work will show!
The example above shows how to create a basic carousel with indicators and controls.
Click on the button to open the modal.
Click on the button to open the modal.
Click on the button to open the modal.
Click on the button to open the modal.
Click on the button to open the modal.
Click on the button to open the fullscreen modal.
Click on the button to open the modal.
The data-bs-placement attribute specifies the tooltip position.
Top Bottom Left RightA toast is like an alert box that is only shown for a couple of seconds when something happens (i.e. when a user clicks on a button, submits a form, etc.).
In this example, we use the .show class to always show the toast by default. You can close it by clicking on the close (x) icon inside the toast header.
Some text inside the toast body
In this example, we use a button to show the toast message.
Some text inside the toast body
Try to scroll this section and look at the navigation bar while scrolling! Try to scroll this section and look at the navigation bar while scrolling!
Try to scroll this section and look at the navigation bar while scrolling! Try to scroll this section and look at the navigation bar while scrolling!
Try to scroll this section and look at the navigation bar while scrolling! Try to scroll this section and look at the navigation bar while scrolling!
Try to scroll this section and look at the navigation bar while scrolling! Try to scroll this section and look at the navigation bar while scrolling!
Try to scroll this section and look at the navigation bar while scrolling! Try to scroll this section and look at the navigation bar while scrolling!
Try to scroll this section and look at the navigation bar while scrolling! Try to scroll this section and look at the navigation bar while scrolling!
Some text lorem ipsum.
Some text lorem ipsum.
Some text lorem ipsum.
Offcanvas is similar to modals, except that it is often used as a sidebar.
Some text lorem ipsum.
Some text lorem ipsum.
Some text lorem ipsum.
The .offcanvas-end class positions the offcanvas to the right of the page.
Use the border classes to add or remove borders from an element:
Round the corner of an element with the rounded classes:
Use .border-1 to .border-5 to change the width of the border:
Use a contextual border color to add a color to the border:
Float an element to the right with the .float-end class or to the left with .float-start, and clear floats with the .clearfix class.
Float an element to the left or to the right depending on screen width, with the responsive float classes .float-*-left|right (where * is sm, md, lg, xl or xxl).
Resize the browser window to see the effect.
Center an element with the .mx-auto class:
Set the width of an element with the w-* classes:
Set the height of an element with the h-* classes:
Set the spacing of an element with the {property}{sides}-{breakpoint}-{size} classes. Omit breakpoint if you want the padding or margin to work on all screen sizes.
Use the shadow- classes to to add shadows to an element:
Change the alignment of elements with the align classes (only works on inline, inline-block, inline-table and table cell elements):
baseline top middle bottom text-top text-bottomCreate a responsive video and scale it nicely to the parent element.
Use the .visible or .invisible classes to control the visibility of elements. Note: These classes do not change the CSS display value. They only add visibility:visible or visibility:hidden to an element:
Use the .close class to style a close icon. This is often used for alerts and modals. Note that we use the times; symbol to create the actual icon (a better looking "x"). Also note that it is right-aligned by default:
Use the .sr-only class to hide an element on all devices, except screen readers:
I will be hidden on all screens except for screen readers.Use the contextual classes to provide "meaning through colors":
This text is muted.
This text is important.
This text indicates success.
This text represents some information.
This text represents a warning.
This text represents danger.
Secondary text.
This text is dark grey.
Default body color (often black).
This text is light grey (on white background).
This text is white (on white background).
Add 50% opacity for black or white text with the .text-black-50 or .text-white-50 classes:
Black text with 50% opacity on white background
White text with 50% opacity on black background
Use the contextual background classes to provide "meaning through colors".
This text is important.
This text indicates success.
This text represents some information.
This text represents a warning.
This text represents danger.
Secondary background color.
Dark grey background color.
Light grey background color.
Lorem ipsum text.
Some buttons:
Lorem ipsum text.
Some buttons:
| Firstname | Lastname | |
|---|---|---|
| John | Doe | john@example.com |
| Mary | Moe | mary@example.com |
| July | Dooley | july@example.com |
Click on the dropdown menu to see the effect.
To create a flexbox container and transform direct children into flex items, use the d-flex class:
To create an inline flexbox container, use the d-inline-flex class:
Use .flex-row to make the flex items appear side by side (default):
Use .flex-row-reverse to right-align the direction:
Use .flex-column to display the flex items vertically (on top of each other):
Use .flex-column-reverse to reverse the vertical direction:
Use the .justify-content-* classes to change the alignment of flex items. Choose from start (default), end, center, between or around:
Use .flex-fill on flex items to force them into equal widths:
Example without .flex-fill:
Change the visual order of a specific flex item(s) with the .order classes. Valid classes are from 0 to 5:
Easily add auto margins to flex items with .mr-auto (push items to the right), or by using .ml-auto (push items to the left):
Control how flex items wrap in a flex container with .flex-nowrap (default), .flex-wrap or .flex-wrap-reverse.
.flex-wrap:
.flex-wrap-reverse:
.flex-nowrap:
Control the vertical alignment of gathered flex items with the .align-content-* classes.
Note: This example does not look good on a small devices. Also note that these classes have no effect on single rows of flex items.
.align-content-start (default):
.align-content-end:
.align-content-center:
.align-content-around:
.align-content-stretch:
Control the vertical alignment of single rows of flex items with the .align-items-* classes.
.align-items-start:
.align-items-end:
.align-items-center:
.align-items-baseline:
.align-items-stretch (default):
Control the vertical alignment of a specific flex item with the .align-self-* classes.
.align-self-start:
.align-self-end:
.align-self-center:
.align-self-baseline:
.align-self-stretch (default):
Use the .form-control class to style textareas as well:
If you want your form elements to appear side by side, use .row and .col:
You can change the size of .form-control inputs with .form-control-lg or .form-control-sm:
Use the disabled and/or readonly attributes to disable the input field:
Use the .form-control-plaintext class to style an input field without borders, but with correct marigins and padding:
To style an input with type="color" properly, use the .form-control-color class:
To style a select menu in Bootstrap 5, add the .form-select class to the select element:
Use the .form-select-lg or .form-select-sm class to change the size of the select menu:
Use the disabled attribute to disable the select menu:
To style a checkbox, use a container element with a .form-check class, and add .form-check-label to labels, and .form-check-input to the input with type="checkbox".
The form below contains three checkboxes. The first option is checked by default, and the last option is disabled:
The form below contains three radio buttons. The first option is checked by default, and the last option is disabled:
Try to submit the form with and without toggling the switch.
To create a custom range menu, add the .form-range class to the input element with type="range":
By default, the interval between the range numbers is 1. You can change it by using the step attribute:
Use the min and/or max attribute to specify the minimum/maximum value of a range:
The .input-group class is a container to enhance an input by adding an icon, text or a button in front or behind the input field as a "help text".
Use the .input-group-text class to style the specified help text.
Use the .input-group-sm class for small input groups and .input-group-lg for large inputs groups:
Add multiple inputs or addons:
You can also use checkboxes or radio buttons instead of text:
Add a dropdown button in the input group. Note that you don't need the .dropdown wrapper, as you normally would.
Click inside the input field to see the floating label effect:
Click inside the textarea to see the floating label effect:
You can also use "floating-labels" on select menus. However, they will not float/get animated. The label will always appear in the top left corner, inside the select menu:
Try to submit the form.
Resize the browser window to see the effect.
The first, second and third row will automatically stack on top of each other when the screen is less than 576px wide.
This example demonstrates a 50%/50% split on small, medium, large, xlarge and xxlarge devices. On extra small devices, it will stack (100% width).
Resize the browser window to see the effect.
In Bootstrap 5, there is an easy way to create equal width columns: just use the .col-size class on a specified number of col elements. Bootstrap will recognize how many columns there are, and each column will get the same width.
Two columns: 50% width on all screens, except for extra small (100% width on screens less than 576px wide)
Four columns: 25% width on all screens, except for extra small (100% width on screens less than 576px wide)
The following example will result in a 25%/75% split on all devices.
The following example will result in a 33.3%/66.6% split on all devices.
Resize the browser window to see the effect.
This example will result in a 50%/50% split on all devices.
In Bootstrap 5, there is an easy way to create equal width columns for all devices: just use the .col class on a specified number of col elements. Bootstrap will recognize how many columns there are, and each column will get the same width.
The following example will result in a 25%/75% split on small, medium, large, xlarge and xxlarge devices (576px and above). On extra small devices, it will stack (100% width).
Resize the browser window to see the effect.
The following example will result in a 25%/75% split on small devices and a 50%/50% split on medium (and large, xlarge, xxlarge) devices. On extra small devices, it will automatically stack (100%).
Resize the browser window to see the effect.
The following example will result in a 25%/75% split on small devices, a 50%/50% split on medium devices, and a 33%/66% split on large, xlarge and xxlarge devices. On extra small devices, it will automatically stack (100%).
Resize the browser window to see the effect.
In Bootstrap 5, there is an easy way to create equal width columns: just use the .col-lg class on a specified number of col elements. Bootstrap will recognize how many columns there are, and each column will get the same width.
If the screen size is less than 992px, the columns will stack horizontally.
The following example will result in a 25%/75% split on small devices, a 50%/50% split on medium devices, a 33%/66% split on large devices and a 20%/80% on xlarge and xxlarge devices. On extra small devices, it will automatically stack (100%).
Resize the browser window to see the effect.
The following example will result in a 50%/50% split on xlarge devices (1200px and above). On large, medium, small and extra small devices, it will automatically stack (100%).
Resize the browser window to see the effect.
In Bootstrap 5, there is an easy way to create equal width columns: just use the .col-xl class on a specified number of col elements. Bootstrap will recognize how many columns there are, and each column will get the same width.
If the screen size is less than 1200px, the columns will stack horizontally.
The following example will result in a 50%/50% split on medium, large and extra large devices, and a 25%/75% split on XXL devices. On small and extra small devices, it will automatically stack (100%):
The following example will result in a 50%/50% split on XXL devices (1400px and above). On extra large, large, medium, small and extra small devices, it will automatically stack (100%).
Resize the browser window to see the effect.
In Bootstrap 5, there is an easy way to create equal width columns: just use the .col-xxl class on a specified number of col elements. Bootstrap will recognize how many columns there are, and each column will get the same width.
If the screen size is less than 1400px, the columns will stack horizontally.